Atom Frenzy – Lesson Overview
Foundation Lessons
These lessons form the core of the Atom Frenzy module, and it is recommended that teachers complete at least these first 6 lessons. You can read through the overviews below or you may wish to check through the activity demonstration videos linked on the right to get a quick idea of the concepts and methods involved in this module.
Please see the Getting Started page for information regarding pretests and how to introduce the Atom Frenzy module.
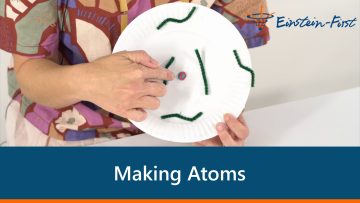
Students learn the name and number of hydrogen, carbon, nitrogen, and oxygen. They then devise rules to make model atoms, learning that atoms are made of protons and neutrons in a tiny central nucleus surrounded by electrons in an electron cloud.
1. Introduction: In Atom Frenzy we are learning about atoms and molecules because that’s what everything’s made of and heat is just about jiggling atoms. Then present the learning intentions using Lesson 1 of the Atom Frenzy PowerPoint.
2. Discussion: What is air? What is air made of? What are atoms? What are the four most important atoms: H, C, N and O. Today we are going to make model atoms.
- Watch the Tidlibits video: What are Atoms? The smallest parts of Elements and YOU!
- Discuss the video with the class and then sing the Top 10 Atoms song.
3. Activity (small groups) – Making Paper Plate Atoms: Students make paper plate model atoms with tiny balls of plasticine for protons and neutrons, and electrons made of 3-5 cm bits of pipe cleaner. Rules for atoms: equal numbers of protons and electrons. Often but not always equal numbers of neutrons. Students work in small groups, each allocated one or more of H, C, N and O.
4. Activity (whole class or small groups) – Introducing Lego Atoms: Each group sees how many different objects they can make with 36 Lego bricks.
5. Group Reporting – Paper Plate Atoms, Similarities and Differences: When students have finished ‘building’ their atom, ask them to sit in their groups in a large circle, with their model atoms in front of them. Each group’s spokesperson names their atom and explains to the class how they made it.
Then create an Atoms ‘Same’ and ‘Different’ chart by asking students two questions: In what way are the atoms the same? In what way are the atoms different? Draw out similarities and differences by questioning.
6. Review and introduce the next lesson: Identify and review all new words and start the class Word Wall and let students know that in the next lesson we will make models of atoms and molecules together.
Students perform the fun class Atoms and Molecules Play which reinforces what they learnt about atoms and then introduces them to molecules by acting out being atoms and molecules. Finally, they make some ‘toy’ molecules by following a set of rules.
1. Introduction: In this lesson, students will use their language of atoms to develop and introduce molecules. Students will develop the idea that a molecule is two or more atoms joined together. Students will:
- Play with toy atoms and feel the forces as they combine into molecules
- Play-act different types of atoms and follow the rules of electrical attraction to form molecules
- Sing songs about key molecules
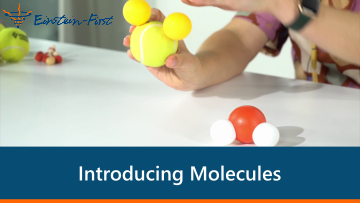
2. Activity (small groups) – Atoms are like Lego bricks: Students recall and share the Lego objects they made last lesson. They then make model oxygen, nitrogen, hydrogen, water and carbon dioxide molecules.
3. Activity (whole class) – Play acting the formation of molecules: Students enact and discuss the Atoms and Molecules Play.
4. Activity (small groups) – Playing with magnetic balls to create model molecules: Students make model oxygen, nitrogen, hydrogen, water and carbon dioxide molecules using magnetic toy atoms (Einstein-First Tatoms and/or Snatoms atoms). Students then make water molecules out of plasticine. Finish by singing the H2O Micky Mouse Molecule Song.
5. Group Reporting – Paper Plate Atoms, Similarities and Differences: When students have finished ‘building’ their atom, ask them to sit in their groups in a large circle, with their model atoms in front of them. Each group’s spokesperson names their atom and explains to the class how they made it.
Then create an Atoms ‘Same’ and ‘Different’ chart by asking students two questions: In what way are the atoms the same? In what way are the atoms different? Draw out similarities and differences by questioning.
6. Review and introduce the next lesson: Identify and review all new words and write them on the class Word Wall. In addition, let students know that in the next lesson we will learn about the forces that hold atoms and molecules together.
With the aid of digital technologies, students will venture into the miniscule world of atoms by exploring Brownian motion and special microscopes to ‘see’ evidence of atoms. They will also act out water molecules bumping each other and into larger particles causing their movement.
1. Introduction: Introduce Lesson 3 by reviewing learnings from the previous lessons and introduce the Lesson 3 learning intentions using the Atom Frenzy Lesson 3 PowerPoint.
2. Teacher-led discussion: The search for evidence of atoms: Discuss how scientists search for evidence by looking for patterns and relationships.
3. Video Discussion: Evidence of Atoms – Brownian Motion: Outline the work of botanist Robert Brown and his connection to the naming of many Western Australian plants and his discovery of Brownian motion.
4. Activity (whole class): Acting out Brownian Motion: Students ‘act out’ Brownian motion by being water molecules jostling a beach ball that models pollen grains.
5. Video Discussion: More Evidence of Atoms: Then ‘fast forward’ about 70 years to 1905 when a young Albert Einstein correctly described Brownian motion as evidence of atoms that are always moving. Then uses a range of digital resources to investigate Brownian motion further: https://youtu.be/NHo6LTXdFns, https://youtu.be/gPMVaAnij88, and https://youtu.be/jLQ66ytMa9I
6. Video Discussion: Even More Evidence of Atoms – A boy and his atom: Complete the lesson by introducing electron microscopes by exploring the many online images of microstructures and introducing images of atoms. Finish by watching the short IBM video A boy and his atom: The world’s smallest movie on YouTube: https://www.youtube.com/watch?v=oSCX78-8-q0
7. Review and introduce the next lesson: Identify and review all new words and write them on the class Word Wall and introduce lesson 4.
Students will discover the forces that hold atoms and molecules together. They will explore forces of attraction and repulsion by electrons and protons by exploring magnetic forces and electrostatic forces.
1. Introduction: Introduce our toy atoms and by reviewing key learnings about atoms and molecules from previous lessons. Then present the learning intentions using the Atom Frenzy Lesson 4 PowerPoint.
2. Activity (small groups) – Exploring magnetic forces: Students play with bar magnets to understand magnetic forces and magnetic poles. They also feel the magnetic forces between toy atoms and explore the different arrangements for joining toy atoms.
3. Discussion – How is magnetism made? Review the paper plate atoms, remind students that the electrons are whizzing around very fast. Magnetism is the force made by moving electrons. In magnets the atoms are all lined up so all the electrons are whizzing in the same direction so their tiny forces add up to make the big forces you can feel. Why do the electrons whizz around? Because they are pulled by the protons in the nucleus but their waviness (fuzzy pipe cleaners) stops them getting too close.
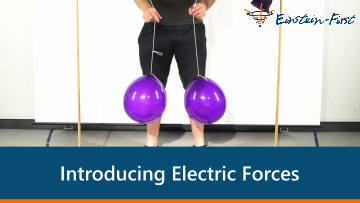
4. Activity (various) – Exploring electric forces: Students in groups rub cloth on balloons and plastic rulers to transfer electrons from one to the other. When there are extra electrons their force does not cancel with the opposite force from the protons and we can feel the electric forces of atoms. Students use bits of paper and their own hair to see the electric forces happen. They should be able to see both attraction and repulsion. These forces are forces of static electricity. https://youtu.be/S3sx9BWbEww, https://youtu.be/9jD56GjsNos
5. Discussion – How did we make the electric forces? electrons were transferred from one object to another in the same way that dirt can get rubbed onto our clothes! Electric and magnetic forces have both attraction and repulsion. We say like charges repel, unlike charges attract. Same for magnets: we say like poles repel, unlike poles attract. Why do we use the word pole? We use the word pole because the Earth is a big magnet: That is how compasses work: the south end of a magnetic needle is attracted to the north end of the Earth’s magnet. The north and south poles of the earth are close to the ends of the earth-sized magnet.
6. Activity (small groups) – Forces in molecules: Students return to the magnetic toy atoms, making H2O and CO2, and identifying that it’s electrical forces that hold atoms together.
7. Review and introduce lesson 5: Review the main learning from the lesson and add to the class Word Wall. In addition, let students know that we will learn about solids, liquids, and gases, and how heat interacts with them in the next lessons.
Students will role-play being water molecules (their body being an O atom and outstretched hands the H atoms) and act out the vibration and movement of water molecules in ice, liquid water and water vapour. They will then then view and discuss a range of digital animations showing the heating and cooling of water molecules and investigate melting, freezing and boiling of water, relating this to the shape of the water molecules.
1. Introduction: Review the key learnings from previous lessons and introduce the learning intentions using the Atom Frenzy Lesson 5 PowerPoint.
2. Discussion – What is Temperature? Discuss what temperature is, how thermometers work and how to read them. Explain how we will use these ideas to understand how heat affects states of matter.
3. Activity (whole class) – Change of State: Whole class acts out the three states of matter. Each person is a molecule. Turn class into a solid, close packed, not jiggling very much. Start jiggling and change to liquid, moving randomly but always in contact. Jiggle more and turn to gas running randomly all over the room.
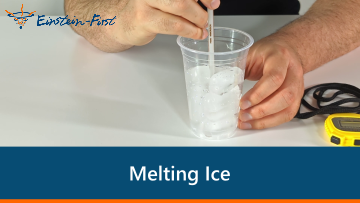
4. Activity (small groups) – Melting Ice Blocks: groups record the melting of ice cubes in cups at the start of the day, take the temperature regularly, and see it rise past zero only when all the ice has melted.
5. Discussion – Digital Images and Animations: Discuss images and videos which can be used to explain states of matter. Modelling melting and freezing using a digital simulator: the teacher should explain how the following simulator shows a solid which melts: https://phet.colorado.edu/sims/html/states-of-matter/latest/states-of-matter_en.html, https://youtu.be/1Jtw8g795Us
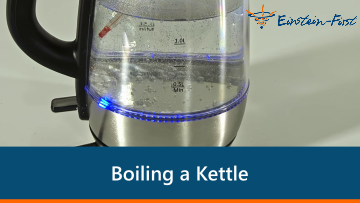
6. Whole Class Demonstration and Discussion – Boiling a glass kettle: (Caution safety!) Why do we get bubbles starting at the bottom? Why do the bubbles go up? What happens to the temperature?
7. Discussion – Arrangement of Water Molecules: Using toy molecules and pictures, discuss how water molecules are arranged in each state of matter and the differences between each state.
8. Review and introduce lesson 6
Students act out dissolving – water molecules colliding with molecules in a crystal, dragging out molecules one at a time. Then, working in groups, they conduct an investigation of dissolving sugar. Each use cups of iced water, cool tap water and hot-tap water. They explain their observations by using their knowledge of forces between molecules and that heat is the vibration of molecules.
1. Introduction: Review key learnings about atoms and molecules from earlier lessons and present the learning intentions using the Atom Frenzy Lesson 6 PowerPoint.
2. Discussion – Sugar: Introduce students to the importance of sugars in our diet to produce energy for us to live.
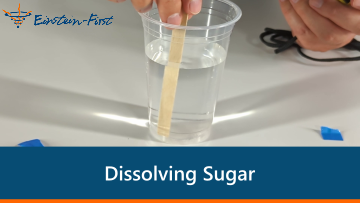
3. Activity (small groups) – Dissolving sugar: Students then use the investigation planner to plan an investigation of sugar dissolving in cold, room temperature and warm water. They then work in their groups to conduct the investigation.
4. Discussion and Activity (small groups) – What happens when sugar dissolves in water: Teacher questioning to elicit understandings about how the shape of water molecules results in them having a positive and negative end that is attracted to the positive and negative parts of the larger sugar molecules. As they are moving, they can ‘break’ sugar molecules out of sugar crystals and then hold and carry them around in solution. Followed by watching a video showing the process. https://youtu.be/ZmWYG7qh0QA
5. Activity (whole class) – Acting out sugar dissolving: Students act out what has just been learnt about H2O and sugar molecules by ‘playing’ moving water molecules in a liquid which ‘break’ sugar molecules out of sugar crystals and carry them around in solution. Through questioning, use knowledge of atoms, molecules, and electric forces to explain how water molecules ‘pull’ sugar molecules apart.
6. Discussion – Sugar and food: Relate dissolving to students’ worlds by relating back to the importance of food, particularly glucose to fuel their bodies, by watching brief videos on how sugars such as glucose and sucrose are carried in solution in blood and the role they play in providing energy for humans and other living things. https://youtu.be/rX5aej5Sv4s, https://youtu.be/dhbJqDWtpMM
7. Review and introduce the next lesson: In their groups, students write down three main things learnt from today’s lesson and share these with their group members and the class. In addition, let students know that during the next two lessons we will explore how runny and sticky some liquids are, and we will relate this to the way the molecules in these liquids ‘stick together’.
Extension Lessons
These lessons are optional extension lessons which explore the concept of viscosity and introduce how it works at an atomic/molecular level.
Students explore the viscosity (or ‘runniness’ and ‘stickiness’) of common kitchen ingredients by observing how easily they pour from one container to another. They also develop a scale and use it to measure the ‘runniness’ and ‘stickiness’ of these liquids.
1. Introduction: Introduce Lesson 7 by indicating students will examine the ‘runniness’ or viscosity of some liquids and learn how the forces between the molecules in each liquid affect how easily they flow and how sticky they are. Then introduce the Lesson 7 learning intentions using the Atom Frenzy Lesson 7 PowerPoint.
2. Discussion – What is viscosity? The teacher introduces viscosity by relating to pouring honey or maple syrup on toast or pancakes, connecting it to how ‘runny’ or ‘sticky’ a liquid is and developing a scale to ‘measure’ viscosity. They then discuss how to measure viscosity of different liquid foods and use an investigation planning sheet to help ensure a ‘fair test’ in each case.
3. Activity (small groups) – The last drop (Method 1): Exploring runniness and stickiness: Working in groups, students test five different liquids. They pour a set volume (e.g. 10 mL) of each liquid kitchen ingredient or food from a small plastic container into a larger cup, measuring the time it takes to flow into the empty cup and rating its flow rate using the scale developed.
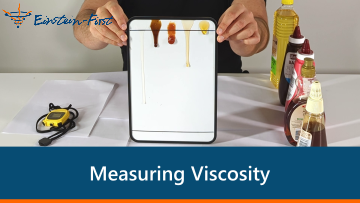
4. Activity (small groups) – Runny Races (Method 2): Alternatively, they may use a small plastic board with depressions cut out of one end to place the five liquids being tested. Each depression is filled with a liquid, the board is tipped so it is almost vertical, and the time it takes for each liquid to run down the length of the board is recorded.
5. Activity (whole class) – Molecules getting through a gap: In an open space, students time how long it takes for the whole class to fit through a small gap. Discuss and compare to how molecules move past each other and how it affects viscosity.
6. Discussion – Summary of concepts: Review findings of the investigations: the flow rate of different liquids at room temperature. Then, through questioning, ask students to describe their observations and explain why different liquids flow at different rates using the molecular model. Encourage students to relate explanations to the strength of the electrical forces between the molecules and the size of the molecules.
7. Review and introduce the next lesson: Review the main things learnt about viscosity including an explanation of different flow rates and new words and write them on the class Word Wall.
Students test the viscosity (or ‘runniness’ and ‘stickiness’) of very cold, room temperature and warm honey and use what they have learnt about atoms and molecules to explain their observations.
1. Introduction: Introduce Lesson 8 by indicating students will build on what they learnt in Lesson 7 and examine the viscosity of a liquid at three different temperatures. They will relate how the forces between the molecules in the liquid are affected by temperature. Then introduce the Lesson 8 learning intentions using the Atom Frenzy Lesson 8 PowerPoint.
2. Discussion – Cold honey: The teacher reviews the learnings concerning viscosity from Lesson 7. They will discuss how they measured viscosity and how they made sure their activity was a ‘fair test’ in each case.
3. Activity – Exploring effect of temperature on viscosity: Exploring the effect of temperature on viscosity: as a whole class demonstration or group activity, students take one of the liquids (e.g. honey) and investigate its viscosity when it is cold, at room temperature and warm. This is achieved by allowing a set volume of the liquid at the three different temperatures to flow through a small funnel or from a teaspoon until it stops dripping.
4. Discussion – How temperature affects viscosity: Review findings of both investigations: the flow rate of different liquids and the flow rate of the same liquid at different temperature. Then, through questioning, ask students to use the molecular model to explain why different liquids flow at different rates and also why they flow more freely when they are warmer. Encourage students to relate explanations to the strength of the electrical forces between the molecules, how much the particles are vibrating and moving when heat energy is added, and also the size of the molecules.
5. Review: Review the main things learnt about viscosity including an explanation of different flow rates and new words and write them on the class Word Wall. Introduce and prepare students for the post-test.

