Hot Stuff – Lesson 5 – Heat Conduction
Working in groups, students explore the transfer of heat in a metal such as aluminium. They then model heat conduction in solids by play acting vibrating atoms and molecules vibrate and use their understanding of phonons to explain heat transfer by conduction.
Introduction: Review the previous lesson and learning, including the model of atoms and molecules, and introduce the Lesson 5 learning intentions using the Hot Stuff PowerPoint.
Acting like atoms – Modelling heat conduction in solids (Kinaesthetic learning): Students line up in three lines which are next to one another. Students enact the jiggling motion transferring from person to person as heat transfer occurs in atoms. As a class, students watch a short video to reinforce this model.
Activity – Heat conduction in a metal: Students time and observe the transfer of heat through metal as it melts butter that is placed in spaced intervals.
Review and introduce the next lesson: Review the main learning from the lesson and add to the class word wall. In addition, let students know that in the next lesson they will learn about how heat can be transferred in liquids and gases.
Students will:
- know that heat can be transferred by conduction in solids
- understand that heat conducts via phonons travelling and creating vibrations at other places
- explain why metals conduct heat better than non-metals
- Identify a suitable location where students can stand in a 10 X 3 grid (grid to match number of students)
Per group:
- Cup or mug
- Strips of aluminium flashing (thicker than foil)
- Access to hot water
- Butter
Per group:
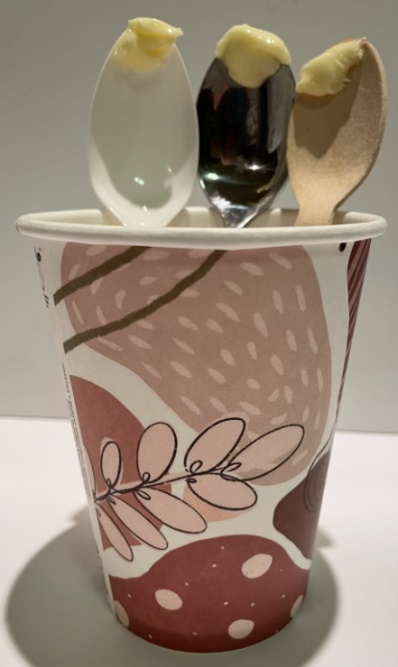
- Take away coffee cup with lid – ensure there are two or three holes in the lid just large enough for the ‘spoon handles’ to fit through
- three ‘spoons’ (metal, plastic and wooden)
- ½ pea-sized bit of butter on the end of each spoon handle
Per group OR one set for teacher for demonstration purposes (extension):
- 10 cm lengths of copper, aluminium and iron wire of roughly the same diameter
- tea candles (one per group)
- lighter (teacher lights the tea candles)
- timer (one per group)
- saucer or other heat resistant material on which to place hot pieces of wire until they cool (one per group)
Review the key learnings so far and introduce the learning intentions using Lesson 5 of the Hot Stuff PowerPoint.
Engage students by asking them who has burnt their fingers by touching a hot spoon in a cup of hot chocolate or hot bowl of soup. Indicate that in this lesson they will explore why the spoon got hot.
On the right you will find a demonstration video for this activity. We recommend viewing this video before proceeding with the text description below.
In this activity, students observe and measure the time it takes for heat to travel along a length of aluminium.
Working in groups, students plan their investigation. Some students may choose to video the activity using a digital tablet or phone.
They should set up the activity on paper towel, or an old newspaper or magazine.
A ~15 cm strip of aluminium flashing is placed in an empty mug/cup and bent as shown in the diagram, with the length inside the cup braced against the opposite wall.
Students place small, cold butter cubes 2 cm apart along the aluminium strip.
- What are we going to investigate? How heat travels along an aluminium strip.
- What do you predict will happen when hot water is poured into the cup? The butter cubes will start to melt.
- Why did we set the equipment up on an old newspaper or magazine? To protect the desk from the falling melted butter.
- Why did we put a twist in the aluminium strip, so it slopes a little to the side? So that when the butter melts it will slide off the strip and drop onto the protective paper.
- What safety precautions must we take when we are conducting this activity? Take great care with the mug of hot water. Once the water has been poured into the mug by your teacher do not touch it until it has had time to cool.
- What is the best way to record your results? Use a table.
- How could we present our results so we can easily see if there is a relationship between the time and how the heat moved along the aluminium strip? Draw a column graph showing distance travelled along the horizontal axis and time in seconds on the vertical axis.
When everything is ready, particularly the timer and recorder, students ask the teacher to fill their mug with hot water (at least 60 °C, up to boiled), observe what happens and measure the time for each butter cube to fall off the aluminium strip.
Danger: Students should not touch or shift the mug once it has the hot water in it.
When the activity is complete, clear the equipment away and put the paper that the butter dripped onto into the bin.
Students could represent their data in graphical form as a dot plot. (You might do this on the whiteboard as a class if you have not previously introduced dot plots.)
Explain that in this activity, the class is going to model how heat is transferred along a metal spoon. This will build on the kinaesthetic learning activity from Lesson 1.
- Who can remind me what we did in that modelling activity? We modelled how atoms and molecules are arranged and how they move in solids and liquids.
- What did we learn about how the atoms and molecules are arranged in solids, and how did they move? They are arranged in regular, fixed positions and they vibrate backwards and forwards.
Students line up in three lines which are next to one another.
If it was very, very cold we would be standing in our fixed position, but hardly moving.
- What happens as it starts to warm up? (The atoms and molecules start to vibrate backwards and forwards a little more vigorously, like jostling in a crowd.)
Organise the students into three lines:

The three students at the back of each line then gently jostle the students standing in front of them, and they in turn gently jostle those in front of them until all students are gently jostling or being jostled by those in front and behind them, without moving their feet (staying in the same position)
If students have access to a digital tablet or phone, one may video the simulation activity. Discuss the model with the students through questioning:
- What did we all represent when we were in our three lines? Atoms or molecules.
- Are we representing a solid or liquid? Solid.
- How do we know this? Atoms or molecules are moving backwards and forwards or vibrating around a fixed position, they do not change position at all.
- What did it represent when the students at the back started jostling those in front of them? Heating the back of the line.
- What did it represent when the 2nd, 3rd, 4th, 5th and so on started to vibrate and jostle one another? Heat transferring along the line.
When heat energy is passed along atoms in a solid, we call this conduction.
Students can watch the following 3-minute Expert Science and Maths Tutor YouTube video: Physics – Energy – Heat Transfer – Conduction
Once they have seen the video, compare the model of conduction of heat shown in the video with your ‘human line’ model.
- Which is best in helping you understand conduction? Be sure to give a reason why. Use the prompt: The model which helped me understand conduction the best was the [‘human line’ or ‘vibrating ball’ model] because…
Reinforce to students that they learnt the words ‘conduction’ and ‘conductor’ in this lesson. Also, introduce the words ‘insulation’ and ‘insulator’ as these will be covered further in Lesson 7. Use Lesson 5 of the Hot Stuff PowerPoint to relate the atomic and molecular vibrations and phonons to heat transfer in solids.
Why do metals conduct heat so well while non-metals like plastic are usually insulators?
The atoms in metals are closely packed together in a regular pattern and some of the electrons are free to move between the metal atoms. This allows the phonons, which are ‘bundles’ of vibrational energy, to pass very quickly through the metal.
In non-metals like plastic or glass, all the electrons are used to bond to the atoms together, so the vibrations do not pass along them as well. They are insulators.
Review the main learning from the lesson and add to the class Word Wall.
In addition, let students know that in the next lesson they will learn about different ways that heat can be produced.
Optional Extension Activities
Do all metals conduct heat at the same rate?
The previous activity showed that metals such as aluminium conducted heat quite quickly.
Now we will investigate whether different metals conduct heat at the same rate.
Students hold 10 cm lengths of copper, iron and aluminium wire of the same diameter in a tea candle flame, one wire at a time.
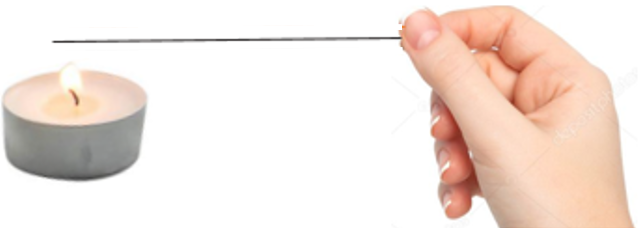
They start a timer as the first wire enters the flame. As soon as they feel heat in the first wire, stop the timer and record the time taken to feel heat in that wire. Then take that wire away and place it on a saucer to cool.
They repeat this procedure for the other two types of metal wire. Students determine which wire conducted heat the fastest. That wire is the best conductor of heat.
Danger: Ensure students are careful not to burn themselves. The pieces of wire will get extremely hot at one end
Have a brief class discussion about which was the best conductor of heat.
Heat conduction in different metals
Students complete this group activity to investigate whether an aluminium, iron and/or copper ‘spoon’ transfers heat most quickly.
Briefly outline the activity and remind students about team roles: manager, speaker, director and recorder.
Ask managers to collect the required equipment
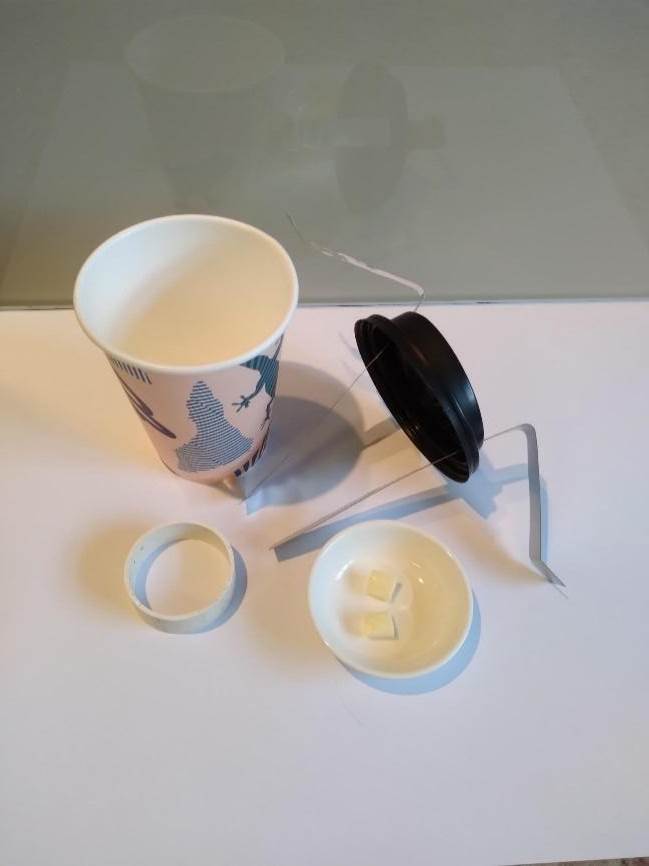
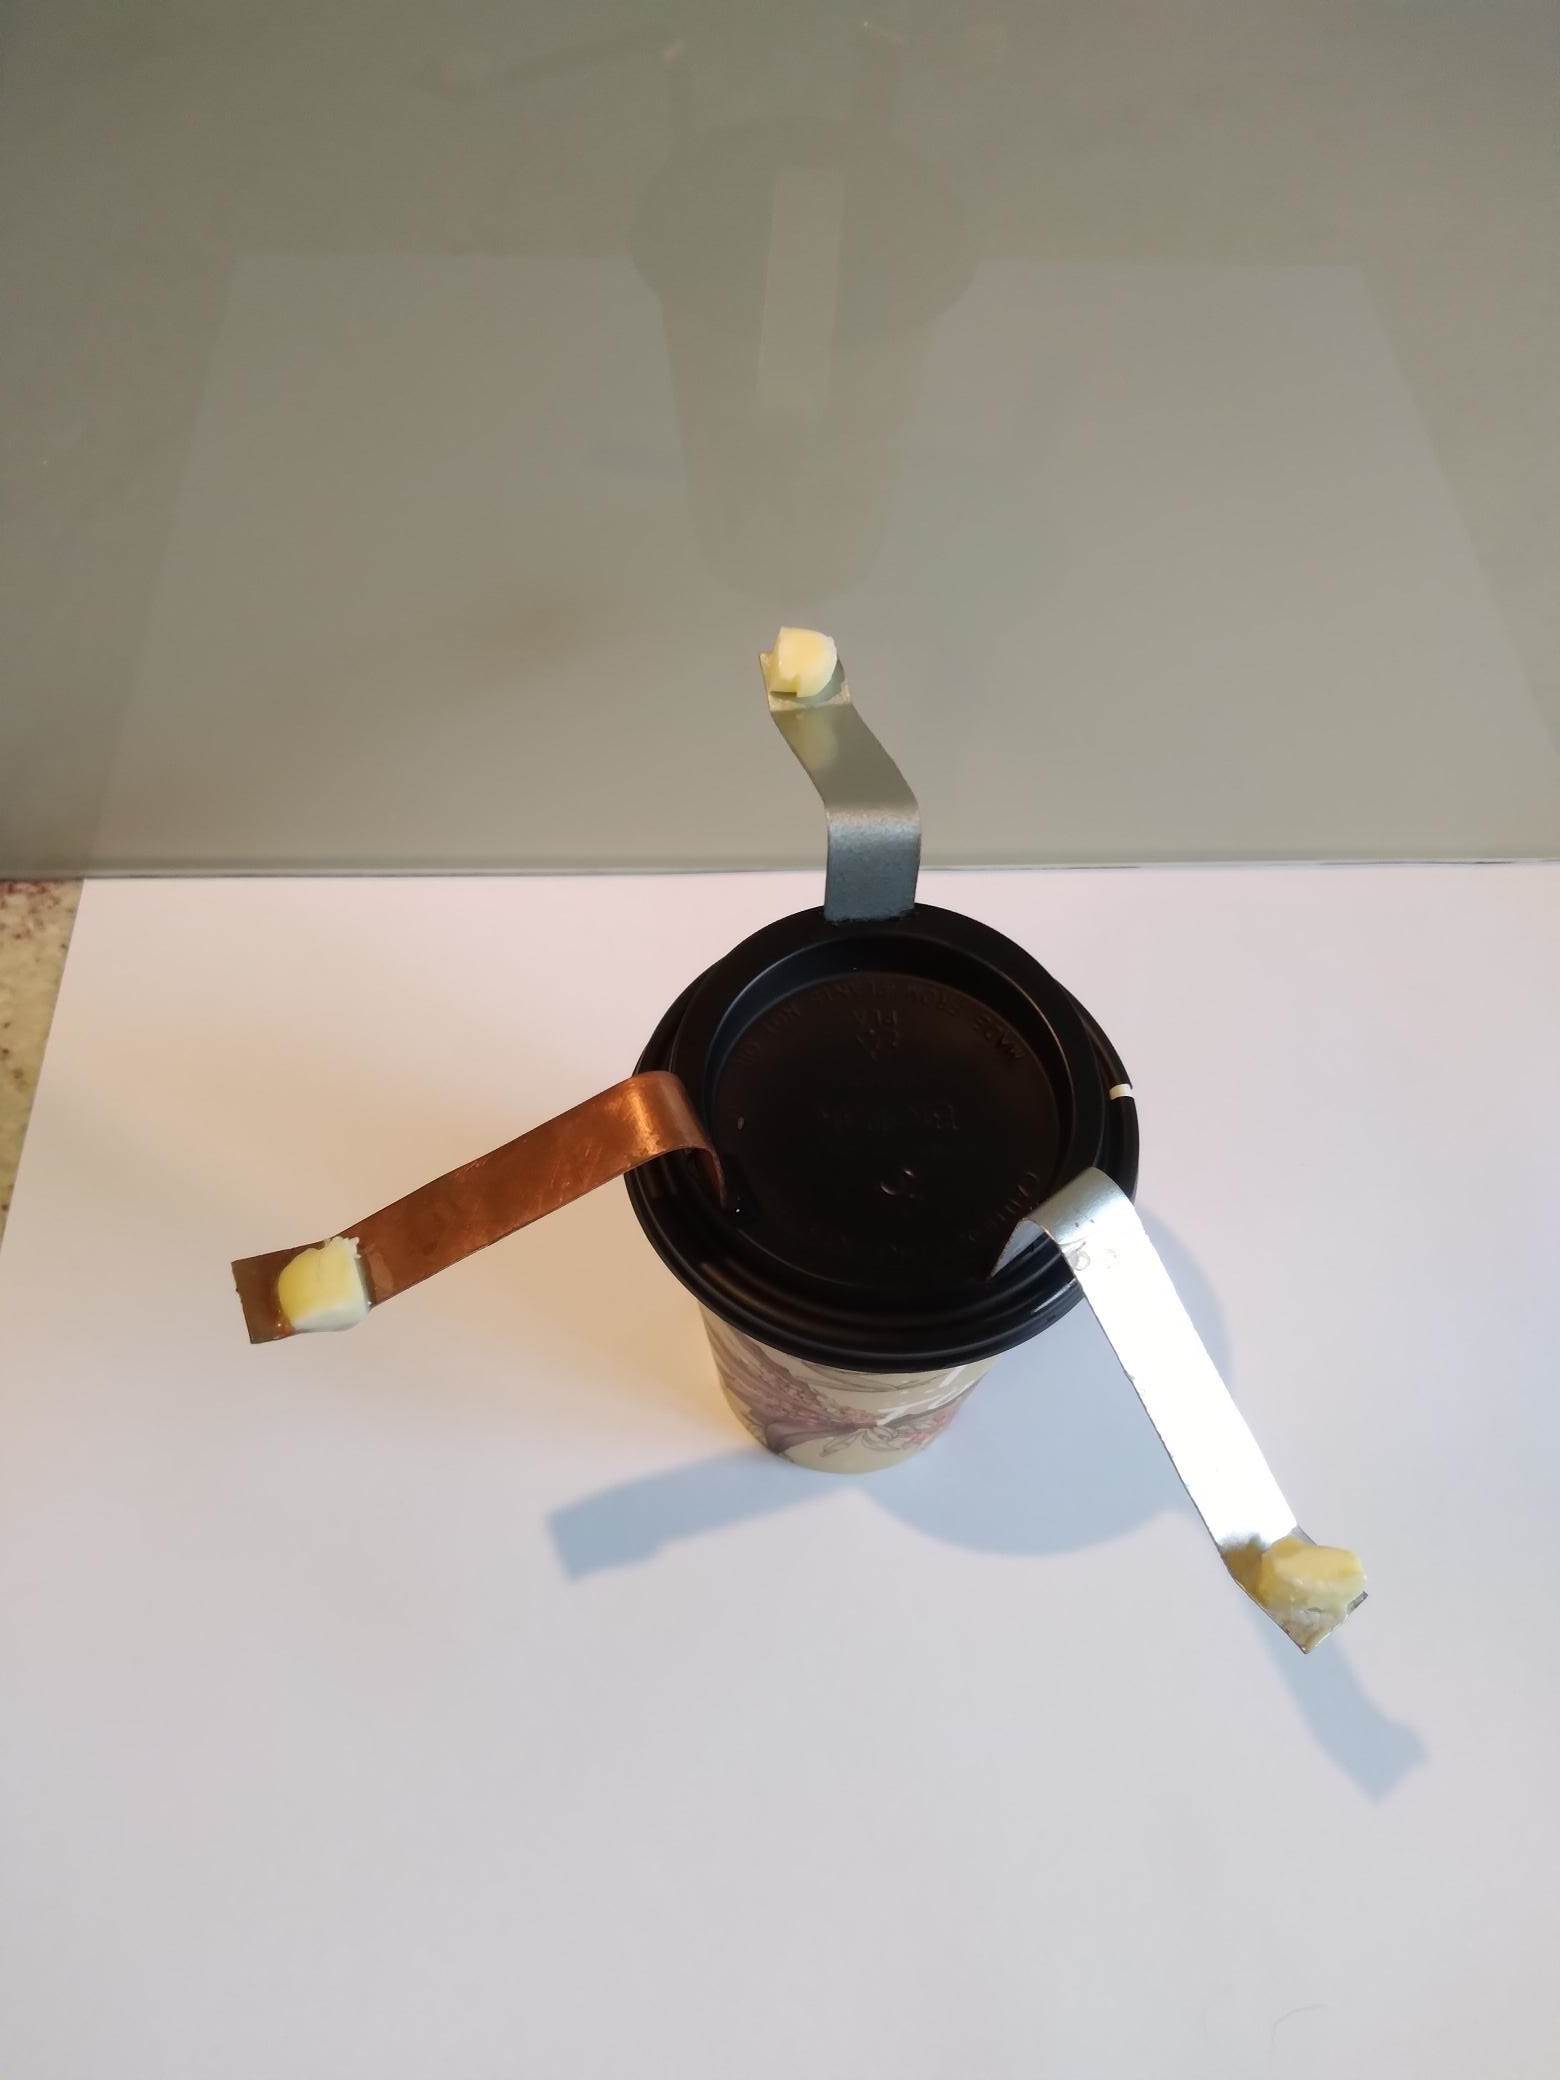
- Paper take-away coffee cup with lid
- two or three ‘spoons’ (iron and aluminium or iron, aluminium and copper) bent as shown so the long end reaches to the bottom of the cup.
- ½ pea-sized bit of butter for the end of each ‘spoon’ handle
Working in groups, students investigate the transfer of heat energy two or three different metal ‘spoon’.
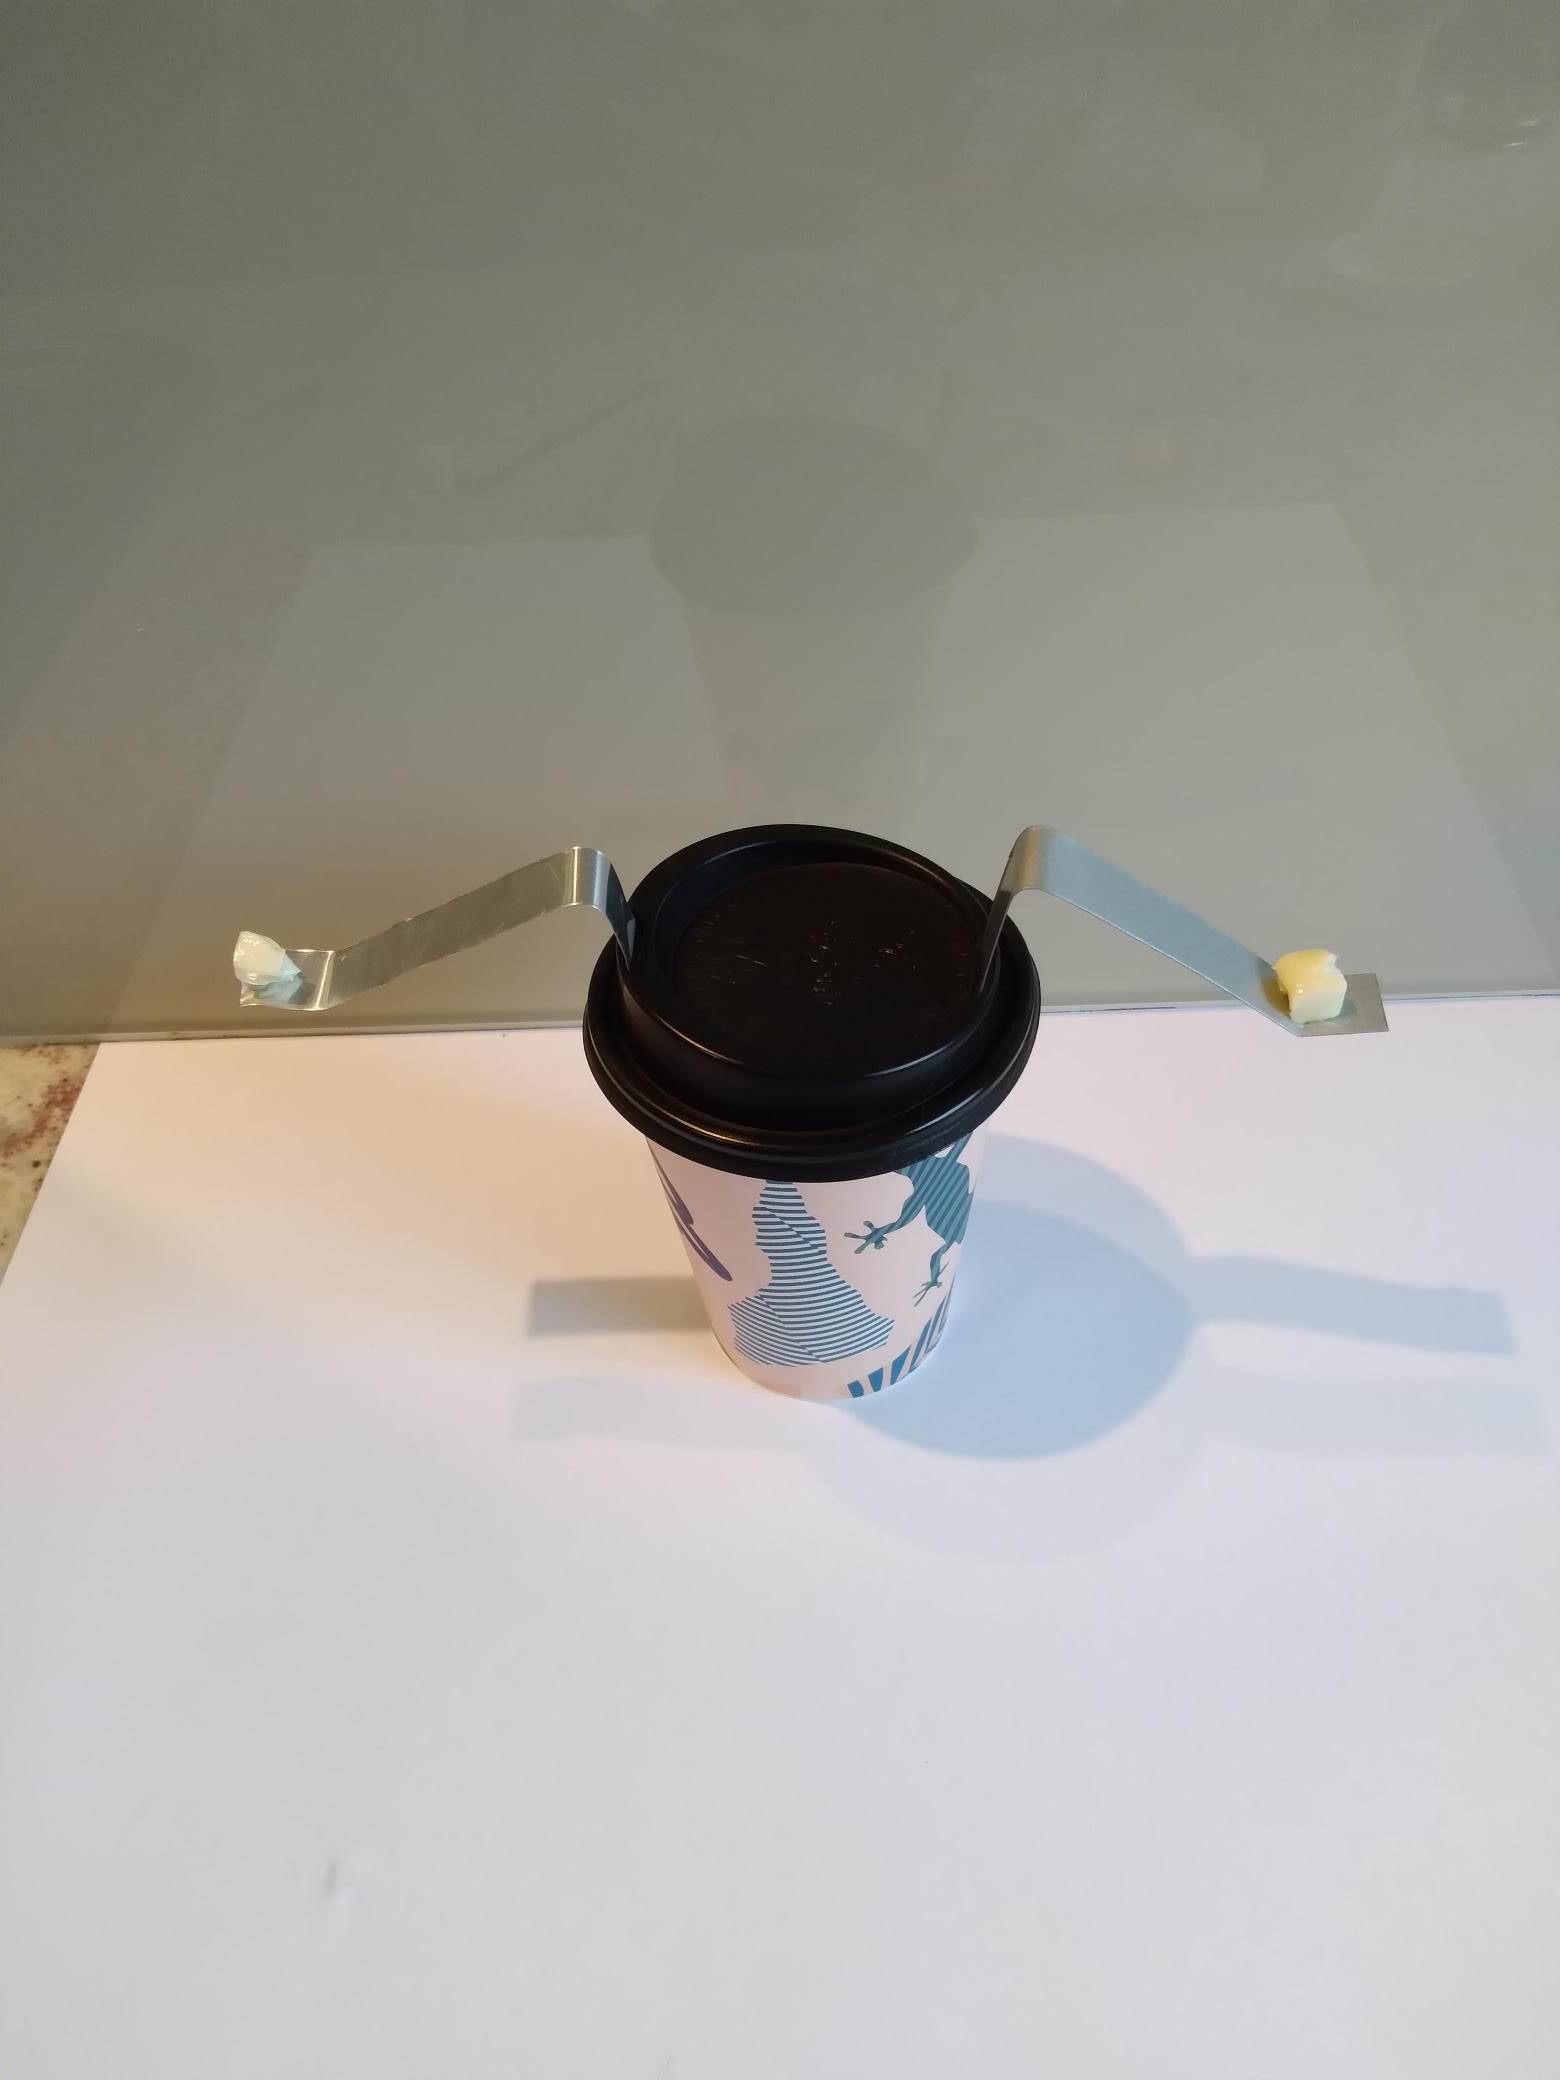
- Students place the long ‘handle’ end of each ‘spoon’ in a cup of hot water with the bent end sticking out through holes cut in the lid
- Using tweezers, they put the ½ pea-sized butter pieces on each spoon ‘handle’
- When all is ready and all team members have each of their roles clear, they ask the teacher to fill the cup with very hot water.
- They measure how long it takes for each piece of butter on the end of each ‘spoon’ to start to melt.
Students should record results and observations in their science journal.
Possible variations and tips
If resources allow, have a strip of copper, aluminium and iron (see figure).
It is preferable to have:
- strips of aluminium, copper, iron, or PVC plastic roughly the same width and thickness.
- Cold, hard butter cubes.
When the activity is complete, students should clean away their equipment.
Following this, the class should discuss the investigation and the results:
- Why is it better to put the butter onto each spoon using tweezers rather that using your fingers? (Warmth from your hand may start to soften the butter.)
- In which spoon did heat travel the fastest? (Generally copper, but it depends on the purity of the copper and the aluminium. Sometimes the aluminium may be faster.)
- Where did the iron come? (Third, it conducted heat quite slowly compared to copper and aluminium.)
- Was this a fair test?
- How could this investigation have been improved?
Heat conduction in a metal, wood, and plastic
See the activity video: https://youtu.be/ZFhUW7t1VUw
The most straight-forward way of investigating conduction of heat in metals, wood, and plastic is to take a spoon made of each of these materials which are about the same shape and size.
Briefly outline the activity and remind students about team roles: manager, speaker, director, and recorder.
Ask managers to collect the required equipment.
Students place a small amount of cold butter on the end of each spoon and place the handle of each spoon into a take-away coffee cup or mug.
Danger: Do not touch or shift the mug once it has water in it.
When everything is set, they ask the teacher to pour hot water into each group’s take-away coffee cup or mug, observe what happens, and record the time for each small amount of butter to start to melt and slide down the spoon.
Once they have recorded the results, they can reach their conclusion about which of the three materials is the best heat conductor.
Conductor: a material that allows heat to be readily transferred through it (by allowing phonons to easily move through it).
Insulator: a material that does not allow heat energy to be transferred through it (by disrupting or slowing the movement of phonons).
Aluminium: a type of metal (that conducts heat well).
Copper: another type of metal (that conducts heat well).
Iron: another type of metal (that conducts heat only moderately well).